Friday, 11 May 2012

My first Mirabilia pattern progress so far

I seem to have been really bitten by the stitching bug lately and have made good progress on my current project. The pattern is called 'Silver Moon Tea' and is from Mirabilia, and here is what I've stitched so far:

This is the first time I've stitched a Mirabilia pattern and I have truly thrown myself in at the deep end as it is a 8 inch by 8 inch piece of solid cross stitching, approx. 16,384 stitches (including beading). WOW.  I would say I'm just over half way through it at this point in time but I am about to take a break from it to stitch my sister a Forever Friends design for her birthday in July and I need to get cracking on that else it won't be done in time.

Here is what the finished Silver Moon Tea will look like:
I'm not sure that I will choose such a heavy frame for it when I do get it finished but I am looking forward to hanging it on the wall...eventually!

I'll probably be back in a couple of weeks with some progress on the Forever Friends piece,
see you soon!
Sarah 

Thursday, 12 April 2012

In the mean time

Hello, I started a new large project last week but it's not at a stage where there's anything interesting to show yet so I thought I'd share a few older projects. I finally got around to washing these pieces in readiness for framing.

This piece was stitched from a Dimensions Gold Collection Petites kit called 'Elegant Geisha'. I completed this late 2011. I intend to get this framed and put up in our bedroom as the dark pink in the Geisha's obi (bow) is the same as the paint on the walls. I also have a couple of kokeshi dolls in there, so it will be in-keeping with the oriental theme.

This one was stitched from a DMC Deco kit called 'Pretty in Pink', I completed this one sometime during 2010, I can't remember exactly when. I chose this design when I was having a fad on all things burlesque. Rather than getting this framed I may make it into a central panel on a cushion cover to give to a friend for her birthday.


I stitched this from a Dimensions kit, which I think was called 'Pegasus & colt'. I began this piece many years ago, found I'd mis-stitched somewhere and couldn't work out how to put it right. I promptly put it in the cupboard and forgot about it :-) I got around to sorting my stitching things out and found it again, this time I was determined to finish and managed to work around my previous mistake (I don't think anyone could tell where I messed up?!). I finally finished it back in 2009, it's a cute design and I like the iridescent threads in the wings and clouds, they are so pretty when they catch the light. Trouble is, if I get it framed I'm not sure where I'll hang it but it's too nice to not do something with...I'll think on it.

Sarah xx


Thursday, 5 April 2012

Hello again, not too long since I last posted! I just wanted to show off my latest large project that I completed on 29 March 2012.


The pattern is called 'Mother Moon' and is available in a book called 'Bewitching Cross Stitch' by Joan Elliott. I love Joan's designs and have many more of her pieces in my wish list to make, especially one or two of her fairies and at least one of her mermaids. This was stitched on evenweave fabric in a pale silver grey, I used DMC cotton threads, Kreinik metallic threads and Mill Hill beads.

I am just finishing off a little stitched scissor fob and as soon as that is done I shall be starting my first Mirabillia pattern called 'Silver Moon Tea'! I am excited to stitch a Mirabillia as they are such exquisite designs and I have seen several up close that have been completed by a friend of mine, the results are just gorgeous.

Sarah x

Monday, 5 March 2012

I'm still here...honest!

Hello, is there anyone out there?!! I wouldn't be surprised if there wasn't as I've been away far too long. I have still been making cards, not so avidly though. Mostly I just make them for family and friends now as I found it far too time consuming and difficult to sell them on the web.

Something I have been doing a fair bit of lately is cross stitch. It was my first real crafting hobby and it's nice to have fallen back in love with it. I have a large piece on the go at the moment but in between stitching that I have managed to make a stitched valentine card as well as a small picture piece.


This small piece is from a book of designs by Joan Elliot called 'Fairy Enchantment', she was lovely and quick to stitch taking me exactly one week to do (she is only 4 & half inches square after all!).
This is the valentine card I made for my husband this year, it is another Joan Elliott design from a book of cross stitch card patterns. Lots of little beads on this one which were a bit fiddly to add but worth is as they finish the pattern off nicely. 

Hopefully I'll be finishing the larger piece I'm stitching very soon and I promised to blog about that one too :-)


Tuesday, 26 April 2011

Mermaids and faeries

Hi there! Over the Easter break I tried out two new rubber stamps I brought recently. The first is a cute mermaid designed by Sherri Baldy, the image is entitled 'Remembering you' and is available here.
I coloured the image with Promarkers and enhanced it a little with some Glamor Dust glitter. Using a brass stencil from Avec I pierced the matting card and made an embroidered frame in aqua metallic thread. This was then layered with ribbons and linen textured card onto some subtle pearlised card before being attached to a basic A5 sized card blank.
This angled shot helps you to see the textured matting card by Inspire Me Papers and the stitching too, which, if I'm honest, was the most fiddly and time consuming part of this card :-)

I brought the stamp for the faery card from the NEC back in March and it is Kraftin Kimmie and is available here. Her name is the 'Forget me not fairy' and I just fell in love with her wild curly hair!
Again the image is coloured with Promarkers and die cut with a Spellbinders oval frame. I chose to use the real colours of a forget-me-not flower and used card stock to match in linen texture and pearlised card. A brass stencil from Marianne's 'Franciens Faeries' range was used to create the embossed corners, with a little paper embroidery in green metallic thread. The flowers and butterfly were both die cut using Joy! crafts dies and the lace was an ebay purchase. All this was mounted onto a white A5 card blank.
Another angled shot to show the embossing better. 

Hope you have all had a lovely Easter break, I'm back to work in the morning, but it's a very short week again, so no complaints there!
Sarah x


Sunday, 17 April 2011

Two CD ROM cards

I've turned out two cards this weekend, one for a wedding and the other for a birthday, both using CD ROMs. Here's the first:
From above
inside
The images on this easel card were printed from the 'Enchanted dreams' CD by Joanna Sheen. It features the fantasy art of Josephine Wall, I've been a fan of hers for years and was delighted when they brought out this CD. There's dozens of lovely images, it's hard to choose which ones to use, I highly recommend it to crafters who love fantasy images. I used an extra large (just a bit smaller than A4) sized base card, topped it with pearlised white card and used some pastel blue card as an accent colour. I do enjoy a bit of paper embroidery occasionally and because I was fairly sure this card would be kept as a keep sake I decided to do a little in the corners in silver thread. The 'stop' was punched out using a Martha Stewart lace border punch and the butterflies were die cut from a set of dies by Joy! crafting. 
The image for the second card I made (also an easel, seems to be a current favourite of mine) was printed from the 'Lesley Anne Ivory' CD by Joanna Sheen. Again this CD is another winner in my opinion, as the artwork of Lesley Anne is beautiful, and there are images to cover a multitude of occasions. This card is for my Dad, who is 70 very soon. He's a cat lover and also loves the garden, so I thought this image should appeal to him (fingers crossed!). As well as being fond of paper embroidery, I also love a touch of dry embossing on pearlised card, so I brought out my brass stencils and chose a pretty daisy flower to decorate the sides of the easel. Again a Martha Stewart border punch was used to create a 'stop' for the card. 

Thank you for looking!
Sarah x


Saturday, 26 March 2011

Some Lili of the Valley cards

Hello folks! Hope you've all been keeping well? I came back  from the Hobbycraft Show at Birmingham NEC on Thursday with a nice stash of Promarkers and a few rubber stamps :-) I brought 4 more Lili of the Valley cute stamps to add to my growing collection, I think they are such good value at £4 each! Because I just had to get started with my new stamps and pens I made three cards yesterday, two for Mother's day and one for my parents wedding anniversary.

The anniversary card stamp is called 'Love Grows' and you do get that as a little sentiment with it, but I wanted to use the round anniversary stamp from Lili of the Valley instead. The image is stamped in walnut Distress Ink onto smooth white card and is coloured using Promarkers. The background papers are from Bo Bunny, I've had them in my stash for ages.
The flower is from Prima crafts in plain cream paper which I coloured to match using Promarkers and the butterflies are cut using a die from Joy! crafts, the lace is from an ebay seller.

The two Mother's day cards were stamped onto watercolour paper, I feel it gives a much more intense colour from the pens but I have a suspicion that it leeched a lot of ink from the markers, I think I'll be more inclined to use the smooth paper in future.
Again the butterflies on both these cards were using dies from Joy! crafts, the flower on the aqua and lemon card is from Prima crafts and coloured using Promarkers, the jewel brad in the center is from Dovecraft, the white cotton lace is from Wild Orchid Crafts The paper on the lilac card is from K&Co 'Dollhouse' range. 

I enjoyed using the Promarkers so much and it's made me think of the potential in lots of the other stamps in my stash too, hopefully I'll be back with more stuff soon.
Sarah x


Tuesday, 1 March 2011

An award!!

I am very pleased to say that the very kind Dianne awarded me with a 'Liebster Blog' award, which I have accepted :-)

In accepting the award I've agreed to the following conditions:

1) You have been tagged, do you want to accept? YES! then create a post on your blog and post the love blog photo.

Link back to the person who gave you the award and say if you accept.

Choose 3-5 of your favourite blogs to tag, link these in your post too and tell the lucky people they have been tagged.

The aim of this award is to bring unknown good blogs to light, so we're asked not to tag somebody "with 3000 followers".


       The first one is Chrissy


       The second is Jo


      The third is Rachael


Hope you will go and visit these lovely blogs.


Sarah xx

Sunday, 20 February 2011

I haven't left the planet, honest

Hello...is there anybody out there?! I'm terrible, it's been an age again since I blogged but as usual I have been crafting away in the background. My card making seems to have gone in two different directions lately...one way I have been stamping and colouring with brush tip pens to make cute cards and in the other I have been creating some simple to construct designs from pre-brought kits. I find both have their good points: some days I just want to put things together quickly and feel like I'm being productive, so the kits help with that. Then other days I want to take my time and try to make something more detailed and that's where the stamping and brush tip pens come in. I think today I'll show you some of the more detailed cards I have recently made:
The above two cards were made for twin girls on their 4th birthday. The stamps are from Lili of the Valley, I have completely fallen in love with their entire range of pretty, cute stamps! I stamped them onto 160gsm watercolour paper and coloured them with 'Whisper' brush tip pens. I am thinking of investing in either some Promarkers or Copics if I continue with this style of card (probably Promarkers as they are cheaper!). The lilac card was decorated with some random handmade papers that I'd had lurking in my stash for ages, but the paper on the yellow card was made using a cuttlebug embossing folder, several different inks pads and some finger tip blending sponges...it was fun to blend the colours together.
I couldn't resist these sweet Forever Friends Easter themed stamps when I saw them recently and decided to use them for the small batch I'll make for this year. There are other images in the set, which I'm going to use next, but this bear with his hot cross buns is my favourite, so I used him first :-) Again the image is stamped onto 160gsm watercolour paper and coloured with 'Whisper' brush tip pens. The flower is made from a die by Marianne Creatables and is one of their 'ribbon flower' designs as there is a slot punched into the top petals that you can thread a narrow ribbon through. I finished them off with a Dovecrafts jewel brad in the centre. The background papers are from the same range as the stamps and all are made by Papermania.
Another card made using a stamp from Lili of the Valley, I think these two little girls having tea together are adorable! The card is 8"x8" and layered with card from Papermania and papers from the Laura Ashley range, the flower is a Prima craft one. The wide crocheted lace border is something I've had for a very long time, my Great Auntie gave it to me many years ago and it was still bundled up with a price tag of shillings and pence on it, so you know that it is at least 40 years old...practicaly an antique, a bit like myself ;-) I punched the bottom of the cream card layer with a Martha Stewart lace border punch to add interest, and gave it a couple of small square buttons to finish. I really enjoyed making this card and I think that my colouring is improving...I hope so anyway! This one is for sale at my Dreamaid shop here.
I'll leave it here for now, and hopefully I'll be back sooner next time. Thank you so much for looking!
Sarah x


Saturday, 29 January 2011

I'm still alive!

I know it's been an age since I last made an entry to this blog, I have several excuses but I won't bore you with them.

I have been crafting, but mostly on a quick and simple level. Here are the results:

I have been practicing colouring with my brush tip markers onto stamped images, something I've not really tried before, hopefully when I've practiced some more I'll be confident enough of the results to post some here soon.

Sarah x


Sunday, 28 November 2010

Next batch of Christmas cards

I seem to be having a fad on CD ROMs, which believe me is a real surprise to me. I brought 'Walk in Wonderland' from My Craft Studio a good while back, made a few cards from it but wasn't overly impressed at the printing results. Well now we have a different printer that lets you print to a very high dots per inch and along with that I have been using different types of papers to print on e.g. vellum, pearlescent, acetate and I've come to appreciate the results much more. With that in mind I've brought a couple of other discs, 'Ivory Cats' and 'Victorian Fairies & Angels' both from Joanna Sheen and 'A little bit of folk' from My Craft Studios, all courtesy of ebay ;-)

With Christmas not far off I've stepped up the card making pace and here are the results:
A shaped edge card made using the 'Ivory Cats' CD ROM from Joanna Sheen
A decoupage card made using the 'Ivory Cats' CD ROM from Joanna Sheen
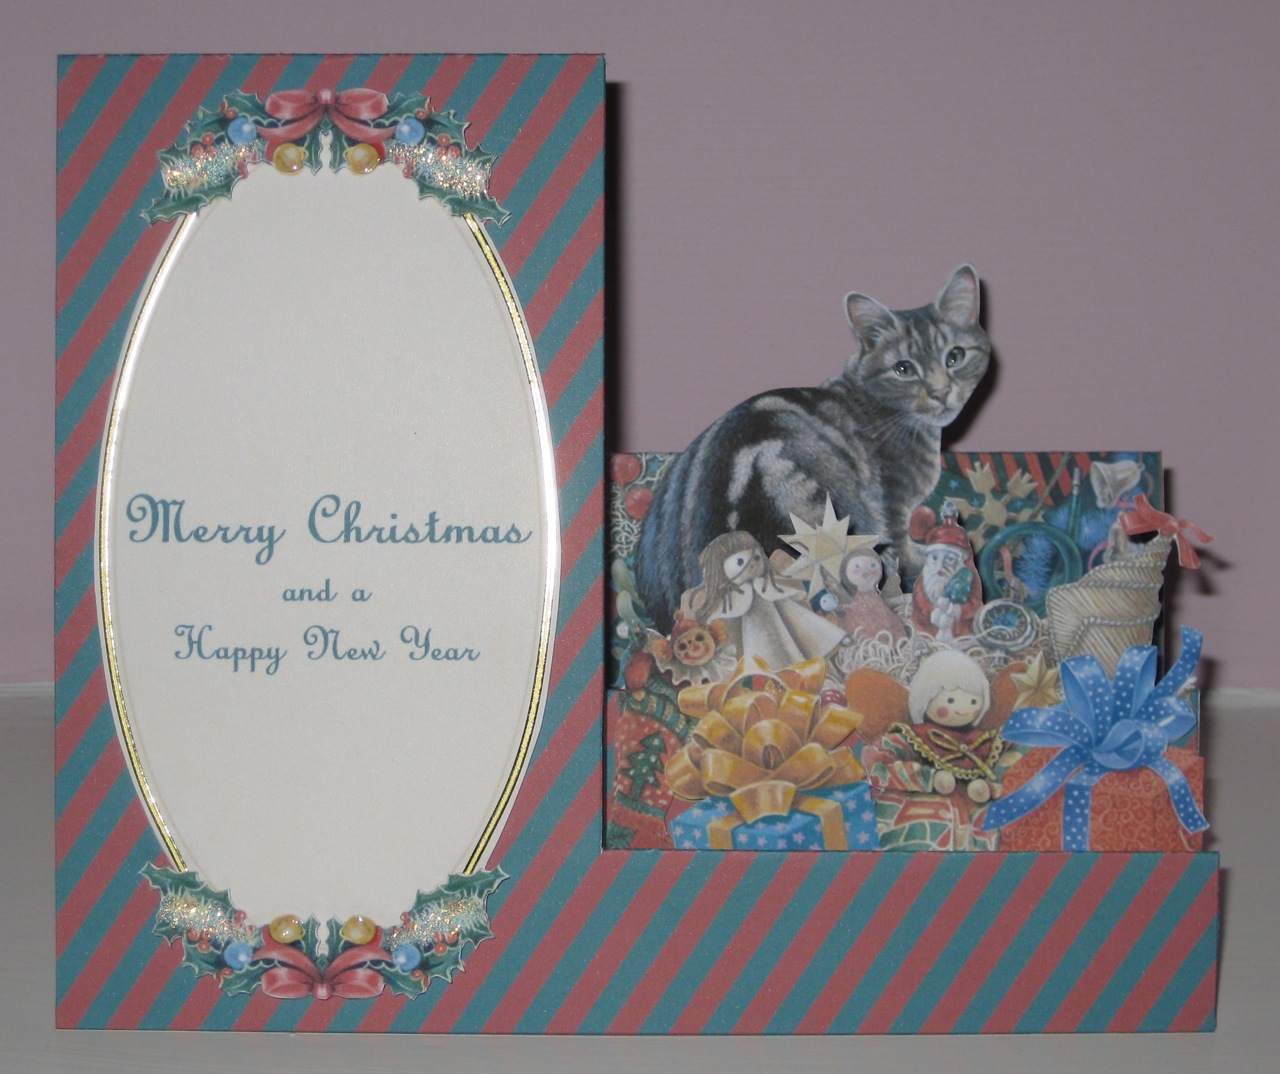
A stepper card made using the 'Ivory Cats' CD ROM from Joanna Sheen
An invertage card made using the 'Enchanted' CD ROM from Card Creations Plus

Still got lots more to make and the pressure is on, why do I always leave things to the last minute?!!
Sarah x


Latest cards

Although I've been away from blogger for a while I have been hard at it making a batch of cards commissioned by a friend. She wanted open cards that could be used for all occasions not just birthdays so I tried to use sentiments that were general and could be used for anything.
Made using the 'Walk in Wonderland' CD ROM from My Craft Studio
Made using the 'Enchanted' CD ROM from Card Creations Plus
Made using 'Elusive Images' stamps, Versamark ink and Distress inks
Made using a Sarah Kay stamp, Nestabilities dies and K & Co papers

Besides these cards for my friend I've made myself a couple along the way
Made for a male friends 50th birthday using the 'Walk in Wonderland' CD ROM 
from My Craft Studio
A birthday card made using the 'Enchanted' CD ROM from Card Creations Plus
A sympathy card for a friend made using 'Victorian Fairies & Angels' CD ROM from Joanna Sheen

So as you can see I've been a busy crafting bee, another blog coming right behind this one with the Christmas cards I've also made!
Sarah x